No products in the cart.
Why Burn Marks Occur in Wood CNC Machining: RPM and Feed Rate Balance
Contents
Introduction and Technical Analysis
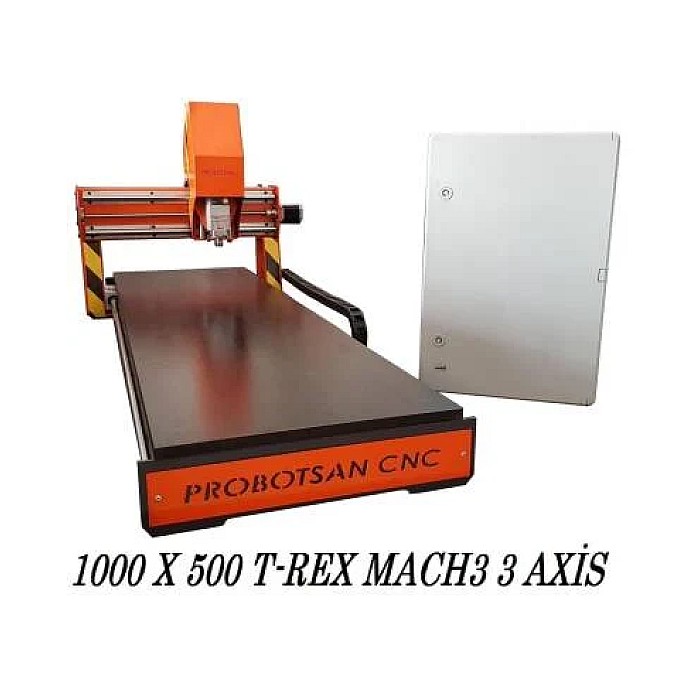
In the industrial woodworking sector, CNC router machines and machining centers are indispensable, offering high precision and efficiency. However, a common and costly issue encountered with these machines is the presence of burn marks on machined wood surfaces. These burn marks are not merely an aesthetic flaw; they lead to material waste, additional processing costs, production time losses, and most importantly, a reduction in cutting tool life. The root cause of burn marks is often the failure to establish an optimal balance between spindle speed (RPM) and feed rate. This balance is directly related to a critical parameter known as chip load, which is vital for the efficiency, quality, and sustainability of woodworking processes. From an industrial automation perspective, correctly setting and monitoring these parameters directly impacts the overall system performance. This guide will delve into the mechanisms of burn mark formation in wood CNC applications, explain the engineering principles behind RPM and feed rate balance, and offer practical solutions for field experts. Our goal is to achieve operational excellence by eliminating this prevalent issue in manufacturing processes.
Operating Principle and Technical Data
The formation of burn marks in wood CNC machines is a result of the dynamic interaction between the cutting tool and the workpiece. Key factors in this interaction include mechanical friction, heat buildup, and material properties. As the cutting tool cuts wood fibers, it generates a certain amount of friction. If this friction reaches a level where the generated heat cannot be dissipated, carbonization, or burning, occurs on the wood surface. This usually happens when the tool rubs or scrapes the wood instead of cutting it cleanly.
Spindle Speed (RPM – Revolutions Per Minute) refers to the number of rotations the cutting tool makes per minute on the spindle. High RPM ensures that the cutting edge contacts more points per unit of time. However, if the RPM is too high and the feed rate is not fast enough, the tool passes over the same point repeatedly, increasing friction and generating excessive heat. Conversely, if the RPM is too low, the tool cannot cut the wood smoothly, tearing or ripping the fibers, which again increases friction and heat. Low RPM can also increase cutting forces on the tool, leading to vibration and tool breakage.
Feed Rate (mm/min) refers to the distance the cutting tool travels over the workpiece per unit of time. The feed rate directly influences the chip load. If the feed rate is too low, the tool “dwells” or “lingers” unnecessarily on the wood, causing each cutting edge to remove a very small chip. This results in the tool rubbing the wood instead of cutting it, leading to increased friction heat and consequently, burn marks. On the other hand, if the feed rate is too high, each cutting edge attempts to remove a very large chip. This can lead to excessive tool loading, motor strain, vibration, poor surface quality (tearing, chipping), and even tool breakage. Even at high feed rates, if the RPM is not sufficiently high, burn marks can still occur because the cutting edges do not move fast enough to cut the wood fibers cleanly.
The key concept that optimizes the relationship between these two parameters is chip load. Chip load refers to the amount of material (mm/flute) removed by each cutting edge (flute) of the cutting tool per revolution. An optimal chip load ensures that the tool cuts the wood effectively, minimizes heat, and efficiently evacuates chips. The chip load formula is as follows:
Chip Load (mm/flute) = Feed Rate (mm/min) / (RPM * Number of Flutes)
The correct chip load prevents tool overheating, extends tool life, and provides a high-quality surface finish. There is a different optimal chip load range for each wood type, tool material, and tool geometry. For example, softwoods generally allow for higher chip loads, while hardwoods may require lower chip loads.
Cutting Tool Geometry and Material: The number of flutes, spiral angle (up-cut, down-cut, compression), diameter, cutting edge material (carbide, HSS, PCD), and coating of the tool also directly affect burn marks. For instance, tools with fewer flutes allow for larger chip loads, while multi-flute tools may be preferred for smaller chip loads and smoother surfaces. Up-cut tools improve chip evacuation, while down-cut tools provide less tear-out on the surface. Compression tools offer clean cuts on both top and bottom surfaces. Tool material and coating directly influence heat generation by affecting the tool’s wear resistance and friction coefficient.
Wood Material Properties: The type of wood (pine, oak, MDF, plywood), its density, moisture content, resin content, and fiber structure also affect heat generation and susceptibility to burn marks. Resinous woods may be more prone to burn marks due to the flammability of the resin. High moisture content can increase the cutting resistance of the tool, while very dry woods can burn more easily.
Chip Evacuation: An effective dust extraction system removes chips from the cutting zone, preventing the tool from re-cutting the same chips and reducing heat buildup. Poor chip evacuation can lead to chip accumulation in the cutting zone and increased friction, triggering burn mark formation.
| Parameter | Value/Description |
|---|---|
| Cutting Tool Material | Solid Carbide |
| Cutting Tool Diameter | 6 mm – 12 mm (Depending on process and material thickness) |
| Wood Type to be Machined | MDF, Plywood, Softwood (Pine), Hardwood (Oak) |
| Recommended Spindle Speed (RPM) Range | 12,000 – 24,000 RPM (Depending on material and tool diameter) |
| Recommended Feed Rate (mm/min) Range | 3,000 – 15,000 mm/min (Depending on material, RPM, and tool diameter) |
| Optimal Chip Load | 0.05 mm/flute – 0.25 mm/flute (Should be checked against manufacturer datasheet values) |
| Number of Flutes | 1, 2, or 3 flutes (Depending on application and surface quality) |
| Depth of Cut / Tool Diameter Ratio | Typically 0.5 – 1.0 times (For maximum cut in a single pass) |
| Dust Extraction System Efficiency | Minimum 90% chip evacuation |
| Tool Runout | Maximum 0.02 mm (Lower values are preferred) |
Field Considerations
- Correct Tool Selection and Sharpness: Selecting the appropriate cutting tool is critical for the type of wood to be machined (hard, soft, MDF, plywood), the geometry to be cut, and the desired surface quality. For example, two-flute carbide tools are generally preferred for MDF, while more durable coated tools may be required for hardwoods. Tool sharpness is a fundamental factor in preventing burn marks. A dull tool generates excessive heat by rubbing instead of cutting. Regular tool inspection and timely replacement or sharpening extend tool life and improve cutting quality.
- Chip Load Optimization: Chip load, the mathematical relationship between RPM, feed rate, and the number of tool flutes, is the most important parameter in preventing burn marks. The amount of material removed by each cutting edge should be neither too little (friction) nor too much (overloading). Optimal values should be found by conducting test cuts in small increments, referencing the chip load ranges recommended by tool manufacturers. Increasing the chip load is often an effective method to reduce burn marks, but care must be taken not to exceed the tool’s durability limits.
- Effective Chip Evacuation: Rapid and complete removal of chips from the cutting zone prevents the tool from re-cutting the same chips and reduces heat buildup. Inadequate dust extraction systems or clogged hoses can lead to chip accumulation and burn marks. Regular cleaning of dust extraction system filters and checking suction power must be ensured. Up-cut tools provide better evacuation by throwing chips upwards, while down-cut tools improve surface quality but can make chip evacuation more challenging.
- Machine Rigidity and Maintenance: The overall rigidity of the industrial CNC router machine, the condition of the spindle motor, and the precision of the motion control axes directly affect cutting quality. Loose connections, worn bearings, or an unbalanced spindle can cause vibration and tool runout, increasing burn marks. Proper balancing of the spindle and regular maintenance minimize vibration and ensure cleaner cuts. Securely clamping the workpiece is also vital to prevent vibration.
- Test Cuts and Parameter Adjustment: When using a new material or tool combination, different combinations of RPM and feed rate should be tested on a small test piece. Starting with more conservative parameters and gradually increasing the feed rate or adjusting the RPM can help find optimal cutting conditions. Observation and experience are the best guides for determining the correct parameters. Precise adjustment of parameters is especially important in corners and tight turns, where burn marks are more frequently observed.
- Understanding Material Characteristics: Properties of the wood material to be machined, such as type, density, moisture content, and resin content, should be considered when determining cutting parameters. For example, woods with high resin content can burn more easily and may require lower RPM or higher feed rates. The material’s moisture content affects the tool’s cutting resistance; very dry wood is more brittle, while very wet wood fibers can be harder to cut.
Common Problems and Solutions
Problem 1: Light Burn Marks at the End of the Cut or in Tight Corners
- Scenario: Slight darkening is observed, typically at points where the tool slows down or pauses briefly, especially at the start and end of cuts or in sharp inside corners.
- Causes: The tool dwelling too long at the same point, momentary drop in feed rate, tool beginning to lose its sharpness.
- Solutions:
- Increase Feed Rate: Increase the chip load to ensure the tool moves faster over the wood.
- Adjust Spindle Speed: If the feed rate cannot be increased, slightly reducing the RPM can decrease friction heat.
- Tool Path Optimization: Check CAM software settings that prevent the tool from pausing or slowing down in corners. Using spiral entry/exit or arc movements can prevent abrupt tool stops.
- Check Tool Sharpness: Replace or sharpen the tool if it is dull.
Problem 2: Deep and Pronounced Burn Marks Throughout the Cut, Intense Odor
- Scenario: Severe darkening and a burning smell occur across the entire machined surface or a large portion of the cut. This usually indicates that the tool is overheating excessively.
- Causes: Chip load is too low (tool is rubbing), inadequate chip evacuation, incorrect tool selection, completely dull tool.
- Solutions:
- Increase Chip Load: Significantly increase the feed rate or decrease the RPM to increase the chip load. This ensures the tool cuts the wood more aggressively.
- Check Dust Extraction System: Ensure the dust extraction system is operating at full capacity and the cutting zone is clean. Use a more powerful system or a different extraction head if necessary.
- Tool Replacement: Immediately replace the tool if it is completely dull. If the wrong tool type is being used (e.g., a tool unsuitable for hardwood), select the correct tool.
- Review Passes: Making multiple passes with shallower depths of cut instead of very deep passes can reduce heat buildup.
Problem 3: Reduced Tool Life and Frequent Tool Changes Required
- Scenario: Tools become dull or break much faster than normal, leading to increased continuous tool costs.
- Causes: Excessive heat and friction (an indicator of burn marks), incorrect tool material or coating, excessive vibration, tool runout.
- Solutions:
- Parameter Optimization: Balance the RPM and feed rate, i.e., optimize the chip load. This will ensure the tool is less stressed and generates less heat.
- Use Quality Tools: Use high-quality carbide or coated tools suitable for the material being machined.
- Machine Maintenance: Check factors such as the condition of the spindle motor, the cleanliness and tightness of the tool holder (collet), and the rigidity of the machine axes. Minimize tool runout.
- Cooling/Air Jet: In some applications, an air jet directed at the cutting zone can aid in chip evacuation and dissipate heat.
Problem 4: Inconsistent Cutting Quality (Burn Marks in Some Areas, Clean Cuts in Others)
- Scenario: Burn marks appear in different areas of the workpiece, while other areas are cut cleanly.
- Causes: Non-homogeneity of the material (areas of different density), insufficient workpiece clamping (vibration), increased tool runout, backlash in machine axes.
- Solutions:
- Material Inspection: Check the quality and homogeneity of the wood material being used.
- Workpiece Clamping: Ensure the workpiece is securely clamped to the vacuum table. If a vacuum table is used, check that the vacuum power is sufficient.
- Machine Calibration: Check and adjust the precision and backlash of the machine axes. Measure and minimize the runout of the spindle motor with the tool holder (collet) and tool.
- Less Aggressive Parameters: Adjusting parameters according to the most challenging area can yield more consistent results throughout the entire cut.
Expert Advice
Burn marks in wood CNC machining processes are more than just a visual defect; they are an indicator of a complex set of problems that seriously affect production efficiency, costs, and overall operational performance. The fundamental principle in combating this issue is to correctly adjust the optimal balance between spindle speed (RPM) and feed rate, which translates to the chip load. For the industrial automation sector, this is not just a machine setting but a critical data point that holds the potential for digitizing and optimizing manufacturing processes. Regardless of their area of expertise, everyone from a CNC operator to a production engineer needs to understand and apply these dynamics.
It must be remembered that woodworking is a variable process. Different wood types, different moisture contents, and even different regions of the same tree can react differently to cutting parameters. Therefore, there is no fixed “one-size-fits-all” solution. Success is achieved through continuous observation, test cuts, and fine-tuning of parameters. While technical data sheets provided by tool manufacturers serve as a starting point, field experience and experimental approaches are indispensable. Finding the optimal chip load may require some time and trial-and-error initially, but this investment will pay off significantly in the long run through extended tool life, reduced scrap rates, and consistent production of high-quality products.
Furthermore, fully leveraging the automation and control capabilities offered by modern CNC machines can further improve these processes. Advanced CAM software can dynamically adjust tool speed and RPM in corners and complex geometries by optimizing tool paths. Real-time monitoring of spindle load, vibration, and even tool wear with sensor technologies provides operators with critical data, enabling proactive interventions. This integrated approach not only addresses issues like burn marks but also increases the predictability and controllability of future production processes. In conclusion, preventing burn marks in wood CNC is a holistic approach that requires a combination of technical knowledge, field experience, and modern automation technologies.
FAQ
What are the main causes of burn marks in wood CNC machining?
Burn marks in wood CNC machining are primarily caused by excessive friction and heat buildup between the cutting tool and the workpiece. This often results from an imbalance between spindle speed (RPM) and feed rate, leading to an incorrect chip load. Other factors include dull tools, poor chip evacuation, incorrect tool selection, and machine rigidity issues.
How can I prevent burn marks on wood during CNC routing?
To prevent burn marks, you need to optimize the balance between spindle speed (RPM) and feed rate to achieve the correct chip load. This means ensuring each cutting edge removes an adequate amount of material. Other solutions include using sharp, appropriate cutting tools, ensuring efficient chip evacuation, maintaining machine rigidity, and conducting test cuts to fine-tune parameters for specific materials.
What is chip load and why is it important for avoiding burn marks?
Chip load is the amount of material removed by each cutting edge of the tool per revolution. It is calculated by dividing the feed rate (mm/min) by the product of RPM and the number of flutes. An optimal chip load ensures efficient cutting, minimizes heat generation, and promotes effective chip evacuation, which are crucial for preventing burn marks and extending tool life.
My CNC router bits are dulling too fast, is this related to burn marks?
If your tools are dulling quickly, it's often a sign of excessive heat and friction, which can lead to burn marks. This indicates that your cutting parameters (RPM, feed rate, chip load) might be suboptimal, or you might be using the wrong tool material/coating. Ensure your machine has minimal runout and consider using an air jet for cooling and chip removal.
Does the type of wood affect how easily burn marks occur?
Yes, the type of wood significantly impacts the likelihood of burn marks. Softer woods generally allow for higher chip loads, while hardwoods require lower chip loads. Resinous woods are more prone to burning due to their flammability. Moisture content also plays a role; very dry wood can burn easily, while very wet wood can be harder to cut cleanly.