Fusion 360 CAM Generation for CNC: Beginner Settings
📑 Table of contents (Click to open)
Introduction and Technical Analysis
The industrial automation sector constantly demands innovative and precise manufacturing techniques. In this context, CNC (Computer Numerical Control) machines play a critical role across a wide spectrum, from prototyping to mass production. To fully leverage the potential of CNC machines, accurate and optimized CAM (Computer-Aided Manufacturing) strategies are indispensable. This technical article and field guide aims to provide a detailed examination of the fundamental settings and critical points for generating CAM strategies for CNC machines using Fusion 360 software, specifically targeting beginner users and engineers working in industrial automation. Our goal is to present the CAM processes used in manufacturing the precise mechanical parts, jigs, and fixtures required for complex automation systems in an understandable and applicable manner. Correct initial settings not only enhance machining quality but also extend tool life, reduce material waste, and most importantly, ensure operational safety. Industrial automation projects often require the production of unique components such as custom-designed brackets, sensor housings, actuator mounting elements, or small assembly parts. The rapid, accurate, and cost-effective production of such parts is vital for the overall success of the project. Fusion 360’s integrated CAD/CAM platform simplifies this process by facilitating the transition between design and manufacturing. This guide will explain each step from the software interface to basic toolpath strategies, setting cutting parameters, and G-code output, enriched with field experience.
Operating Principle and Technical Data
Fusion 360’s CAM module operates on the principle of converting three-dimensional design models into command sets that CNC machines can understand, namely G-code. This conversion process involves various steps and requires the correct configuration of technical parameters. Fundamentally, it involves defining how a workpiece will be machined, which tool will be used, its rotational speed (RPM), its feed rate (how fast it moves), and the depth of cut. In the industrial automation sector, materials such as aluminum alloys (e.g., 6061, 7075), engineering plastics (e.g., Delrin, PEEK), stainless steel, or mild steel are commonly machined. Each material has its unique machining characteristics, which directly influence CAM settings.
The first step when starting the CAM process in Fusion 360 is Setup. In this phase, the position of the workpiece on the CNC machine, the zero point (Work Coordinate System – WCS), and the stock (raw material) dimensions are defined. Correctly setting the WCS is critical for ensuring that the generated G-code provides the correct reference points to the machine. Typically, the WCS is selected from the corners or center of the workpiece. Stock definition determines the initial raw material size of the part to be machined and is necessary for the accuracy of simulations.
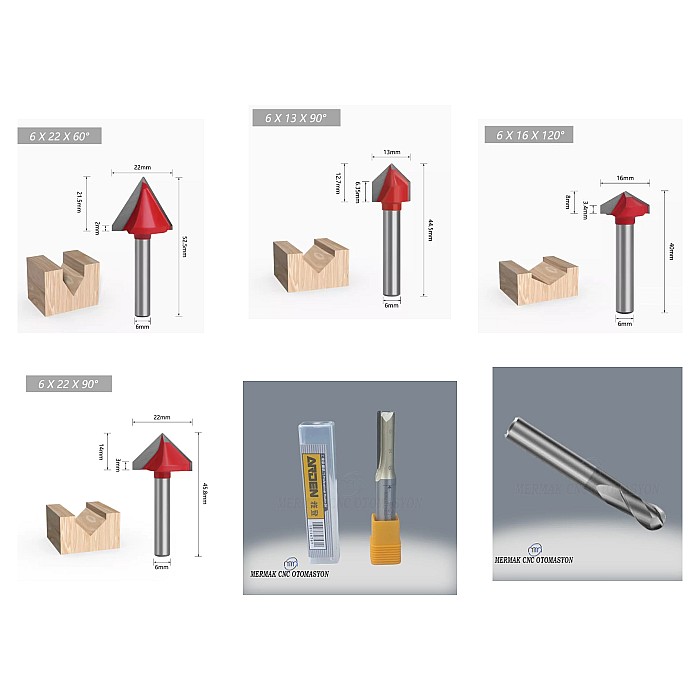
The second important step is managing the Tool Library. Properties such as the diameter, flute count, cutting length, material (HSS, Carbide), and coating of each tool must be accurately defined. This information forms the basis for calculating cutting parameters (RPM and feed rate). Incorrect tool definition can lead to erroneous cutting parameters, resulting in tool breakage, poor surface quality, or dimensional errors.
The third and perhaps most critical step is selecting and configuring Toolpath strategies. Fusion 360 offers various machining strategies such as 2D, 3D, and drilling. The most commonly used toolpaths for beginners are:
- 2D Face: Typically used to flatten the top surface of the stock and achieve the desired thickness.
- 2D Adaptive Clearing: Ideal for rough machining. It ensures the tool remains under load, extending tool life and enabling rapid material removal. It is particularly effective for deep pockets or complex contours.
- 2D Contour: Used for finishing the external or internal contours of the workpiece. It is important for precise dimensions and good surface quality.
- Drilling: Used for various hole types (through holes, tap holes, counterbores). The hole diameter and depth are directly related to the tool selection.
For each toolpath strategy, Cutting Parameters must be set. These parameters should be carefully adjusted based on factors such as the tool material, workpiece material, and machine power:
- Spindle Speed (RPM): Determines how many revolutions the tool makes per minute. It is usually calculated from the surface speed (SFM or m/min) formula. Higher speeds can provide better surface finish, but excessive speeds can lead to tool overheating and breakage.
- Feed Rate (mm/min or inch/min): Determines how far the tool advances over the workpiece per minute. It is often calculated based on the chip load per tooth (FPT or mm/tooth). The correct feed rate is critical for optimal chip formation and tool life.
- Stepover: Determines how much the tool moves sideways in the next cut. It is usually expressed as a percentage of the tool diameter. Higher values are used for roughing, and lower values for finishing.
- Stepdown: Determines the depth of material the tool removes in a single pass (along the Z-axis). The tool’s cutting length, rigidity, and the hardness of the material being machined should be considered.
- Coolant: Used to prevent overheating of the tool and workpiece, clear chips, and improve surface finish. Options typically include flood, mist, or air blast.
After all toolpaths are defined, the Simulation step follows. This step allows visualization of the tool’s movement on the workpiece before G-code generation. It is a vital step for detecting collisions, unnecessary movements, or missed machining areas. Simulation can prevent potential machine damage or material waste.
Finally, G-code is generated through Post-Processing. Fusion 360 offers ready-made post-processors for various CNC control units (e.g., Fanuc, Haas, Siemens, GRBL). Selecting the correct post-processor is essential for the generated G-code to be read error-free by the CNC machine. Using the wrong post-processor can cause the machine to error out or perform incorrect movements. In industrial automation applications, it may be necessary to machine the same part on different machines, making flexible post-processing capability important.
| Parameter | Value/Description |
|---|---|
| Workpiece Material | Aluminum Alloy 6061-T6 |
| Tool Type | 2 Flute Carbide End Mill |
| Tool Diameter | 6 mm |
| Spindle Speed (RPM) | 8000 – 12000 RPM (Verify based on tool manufacturer’s datasheet) |
| Feed Rate | 800 – 1500 mm/min (Targeting chip load of 0.03-0.06 mm/tooth) |
| Stepover | 20% – 40% of tool diameter (For roughing) |
| Stepdown | 50% – 100% of tool diameter (Depends on tool cutting length and rigidity) |
| Cooling Method | Flood Cooling |
| Post-Processor | Generic Fanuc or specific post-processor suitable for the machine |
| Work Offset | G54 (Workpiece zero point on the machine) |
Field Considerations
- Material and Tool Compatibility: Ensure the selected tool (material, coating, geometry) is fully compatible with the material to be machined. For example, tools specifically designed for aluminum with bright, sharp flutes differ from those with hard coatings designed for stainless steel. Incorrect tool selection shortens tool life, degrades surface quality, and most importantly, leads to tool breakage. Always use the tool manufacturer’s recommended cutting parameters as a starting point.
- Workholding Rigidity: Securely and rigidly clamping the workpiece to the CNC machine is fundamental to the entire machining process. Vibrations can cause dimensional errors, poor surface quality, and tool breakage. When using vises, fixtures, or custom clamping elements, select the safest clamping method by considering the direction and magnitude of machining forces. Ensure the part will not shift or vibrate during machining.
- Tool Compensation and Offsets: Ensure that tool compensation codes like G41/G42 and tool length offset settings are correctly configured in the CAM software. Tool length and diameter compensation are vital for machining the part to the desired dimensions. The tool offsets on the machine must be consistent with the settings in CAM. Especially during initial machining trials, minimize potential offset errors by approaching the part at reduced speeds and proceeding cautiously.
- Cooling and Chip Evacuation: Adequate coolant or air flow is critical for evacuating chips from the cutting zone and preventing excessive tool overheating. Recutting chips degrades surface quality, shortens tool life, and can even lead to tool breakage. To improve chip evacuation in deep pockets or narrow areas, optimize the toolpath as needed (e.g., chip breaking strategies, retracts).
- Zeroing Procedures and Calibration: Accurately and precisely setting the workpiece zero point (WCS) on the CNC machine is the most important step for the dimensional accuracy of the manufactured part. Perform zeroing procedures repeatably and precisely using tools such as mechanical probes, edge finders, or laser probes. Ensure the machine’s calibrations are performed periodically and that the axes are accurate.
- Post-Processor Selection and Testing: Each CNC machine’s control unit may use a different G-code dialect. Select the correct post-processor to ensure that the G-code generated by Fusion 360 is fully compatible with your machine’s control unit. When using a new machine or post-processor, perform a simple test part or a dry run before starting to machine a complex part to verify that the G-code operates correctly.
- Taking Simulation Seriously: The toolpath simulation in Fusion 360 is a powerful tool for detecting potential collisions, unnecessary movements, or areas of missed machining. Never skip this step. By carefully observing the simulation, check whether the tool and holder collide with the workpiece or clamping elements. This is one of the best ways to prevent costly machine damage and material waste.
Common Problems and Solutions
In CNC CAM processes within the industrial automation sector, there are several common problems that beginner users and even experienced operators may encounter, along with their solutions:
- Tool Breakage: This is one of the most frequent and costly problems. It is usually caused by incorrect cutting parameters (excessively high feed rate, too low RPM, excessive stepdown), inadequate chip evacuation, wrong tool selection, or insecure workpiece clamping.
- Solution: Use the tool manufacturer’s recommended cutting parameters as a starting point and optimize gradually. Increase coolant pressure or use an air blower to improve chip evacuation. Review the toolpath, especially in deep pockets, with chip breaking or stepped depth strategies. Ensure the workpiece is securely clamped on the machine.
- Poor Surface Finish or Burr Formation: The presence of roughness, marks, or excessive burrs on the machined part’s surface degrades the final product quality.
- Solution: Optimize chip load by reducing the feed rate or increasing spindle speed. Check tool sharpness; dull tools lead to poor surface finish. Use a smaller stepover and higher RPM for the finishing pass. Review coolant usage; insufficient cooling for some materials (e.g., aluminum) can cause chips to stick to the tool.
- Dimensional Errors: The machined part deviating from the expected dimensions can lead to assembly issues.
- Solution: Verify WCS and tool offsets. Ensure the machine’s axes are properly calibrated and that there is no backlash. Check if the workpiece is securely clamped and not flexing under cutting forces. Use appropriate finishing passes with optimized parameters to achieve final dimensions. For tight tolerances, consider using a finishing tool with a smaller diameter or a dedicated finishing strategy.
- Excessive Machining Time: The process taking longer than expected can impact production efficiency and cost.
- Solution: Optimize toolpath strategies for faster material removal (e.g., adaptive clearing for roughing). Increase feed rates and spindle speeds within safe limits. Reduce unnecessary retracts or rapid movements. Use multiple tools if appropriate for different operations to minimize tool changes. Ensure the machine’s acceleration and deceleration settings are optimized.
- Collision Detection Errors in Simulation: The simulation software flags potential collisions, but they still occur during actual machining.
- Solution: Double-check all setup parameters, including WCS, stock definition, tool dimensions, and fixture geometry in the simulation environment. Ensure the post-processor accurately translates the toolpath commands. Verify that the machine’s physical limits and tool reach are correctly accounted for. Sometimes, minor adjustments to toolpath lead/lag or retract heights are necessary.
- Incorrect G-code Output: The machine behaves unexpectedly or errors out when running the generated G-code.
- Solution: Confirm that the correct post-processor for your specific CNC machine model and control system is selected in Fusion 360. If issues persist, consult the machine manufacturer or a CAM specialist to fine-tune the post-processor settings. Test the G-code with a dry run (air cutting) before machining the actual part.
Conclusion
Mastering Fusion 360 for CNC CAM generation is a crucial skill for anyone involved in industrial automation manufacturing. By understanding the fundamental principles of setup, tool selection, toolpath strategies, and cutting parameters, users can significantly improve the efficiency, accuracy, and quality of their CNC operations. While the software offers powerful capabilities, careful attention to detail, thorough simulation, and adherence to best practices in machining are essential for success. The insights and solutions provided in this guide aim to equip beginners with the confidence to tackle common challenges and optimize their CAM workflows. For complex projects or specialized materials, consulting with experienced CAM engineers or CNC machine manufacturers like Mermak CNC can provide invaluable support and ensure optimal results.
Ready to optimize your CNC production? Request a quote on WhatsApp today and let’s discuss your project needs!