3D Woodworking Techniques with V-Bit Carving Tools
📑 Table of contents (Click to open)
- Introduction and Technical Analysis of 3D Woodworking Techniques with V-Bit Carving Tools
- Working Principle and Technical Data of 3D Woodworking Techniques with V-Bit Carving Tools
- Key Considerations for 3D Woodworking Techniques with V-Bit Carving Tools in the Field
- Common Problems and Solutions in 3D Woodworking Techniques with V-Bit Carving Tools
- Conclusion and Expert Advice on 3D Woodworking Techniques with V-Bit Carving Tools
- FAQ
Introduction and Technical Analysis of 3D Woodworking Techniques with V-Bit Carving Tools
In today’s rapidly evolving industrial automation landscape, CNC router machines and machining centers have revolutionized the woodworking sector. Among the techniques that combine the precision and aesthetics of traditional craftsmanship with modern machine accuracy and efficiency, V-Bit Carving stands out. This method is indispensable for 3D woodworking applications, offering unique levels of depth and detail for producing intricate logos, artistic reliefs, letterforms, and decorative panels. From an industrial automation perspective, V-Carving is critically important due to its repeatability, high precision, and capacity for mass production with minimal human intervention. This technique holds full automation potential, with designs created in a CAD (Computer-Aided Design) environment and then converted into machining codes via CAM (Computer-Aided Manufacturing) software. The conical structure of V-bit tools allows the carving width to change as the machining depth varies; this feature makes it possible to create details of different widths and depths using a single tool. This reduces tool change times, increases production efficiency, and simplifies the machining of complex surfaces. Combined with the natural texture and grain structure of wood, this technique yields aesthetically rich and tactilely appealing products. Especially in sectors like the furniture industry, interior architectural applications, signage production, and art pieces, the detail and quality offered by V-Carving significantly enhance product market value. This guide will thoroughly cover the fundamental principles of V-Bit Carving techniques, their industrial applications, technical details, and solutions for common challenges encountered in the field.
Working Principle and Technical Data of 3D Woodworking Techniques with V-Bit Carving Tools
The core of V-Bit Carving technique lies in the use of specialized cutting tools with a conical geometry. These tools are typically manufactured with angles such as 60°, 90°, 30°, or other variations. As the pointed tip of the tool descends below the surface to be machined, the width of the cut channel increases. This dynamic relationship, managed precisely by CAM software’s toolpath strategies, allows for working on both fine details and broad areas with a single tool. During machining, the CAM software analyzes the contour information of the 3D model and automatically calculates the required carving width by correlating the depth at each point with the V-bit tool’s angle. This enables V-bit tools to create true 3D relief effects by changing the carving width with depth variations, unlike flat-bottom tools that cut at a fixed depth. For instance, when carving a letter, wider parts of the character are achieved by cutting deeper, while thinner parts are created by working closer to the surface. This feature makes V-Carving unrivaled, especially for creating sharp corners and precise details.
In terms of technical data, the selection of V-bit tools varies depending on the type of material to be machined, the detail level of the design, and the desired aesthetic outcome. Smaller angle (e.g., 30°) tools are ideal for very fine details and sharp corners but may require slower feed rates and shallower cutting depths. Larger angle (e.g., 90°) tools offer wider grooves and faster material removal capacity but have lower detail precision. Tool materials are typically carbide or HSS (High-Speed Steel), with carbide tools offering longer life and better performance in hardwoods. Machining parameters, namely spindle speed (RPM), feed rate, and stepdown, must be optimized according to the material’s hardness, the tool’s diameter, and its angle. Incorrect parameters can shorten tool life, degrade surface quality, or even lead to tool breakage. For example, higher RPM and feed rates can be used for softwoods, while lower RPM and feed rates should be preferred for hardwoods. Furthermore, toolpath strategies are crucial. Single-pass V-Carve is generally faster but can create excessive load on the tool depending on the volume of material to be removed. Multi-pass or “clear out” strategies involve roughing out larger areas with flat-bottom tools first, then detailing with a V-bit, providing better surface quality and longer tool life. These techniques are widely used in the production of furniture panels, door decorations, gift items, and artistic objects. In the context of industrial automation, the complete digitalization of these processes and their integration with CNC machines ensure consistency, efficiency, and cost-effectiveness in production.
| Parameter | Value/Description |
|---|---|
| V-Bit Angles | 30°, 60°, 90°, 120° (Common Usage) |
| Tool Material | Solid Carbide, HSS (High-Speed Steel) |
| Spindle Speed (RPM) | 12,000 – 24,000 RPM (Varies by material and tool) |
| Feed Rate | 1,500 – 6,000 mm/min (Depends on material hardness and detail density) |
| Stepdown | Single pass or 1-3 mm (Depends on design depth and material hardness) |
| Application Areas | Letter Carving, Logo Machining, Artistic Reliefs, Decorative Panels, 3D Geometric Patterns |
| Compatible Materials | MDF, Plywood, Solid Wood (Oak, Maple, Pine, etc.), Plexiglass, PVC |
Key Considerations for 3D Woodworking Techniques with V-Bit Carving Tools in the Field
- Correct Tool Selection and Calibration: The angle and diameter of the V-bit tool must directly match the detail level and depth requirements of the design to be machined. For example, narrow-angle (30°) tools should be preferred for very fine lines, while wide-angle (90°) tools are better for wider and deeper carvings. Absolutely precise tool zeroing (Z-zeroing) is critical. Incorrect zeroing can lead to depth deviations or unwanted marks on the surface. Proper and tight clamping of the tool in the spindle collet prevents runout issues, extending tool life and improving surface quality.
- Material Preparation and Clamping: The surface of the wood material to be machined should be as flat and smooth as possible. Uneven or wavy surfaces can negatively affect the precise depth control of V-Carving, leading to inconsistencies in carving depth. Securely clamping the material to the work table prevents vibrations and slipping during machining. Vacuum tables or mechanical clamps can be used for this purpose. The grain direction of the material is also important; especially in softwoods, cuts perpendicular to the grain can cause more tear-out. For best results, cuts parallel or slightly angled to the grain direction should be preferred.
- CAM Software Optimization and Simulation: V-Carving machining strategies must be correctly defined in the CAD/CAM software. Accurate transfer of the 3D design and precise calculation of toolpaths directly affect the quality of the final product. Parameters such as “Start Depth” and “Flat Depth” specifically determine how deep the V-bit will cut and where flat bottoms will be formed. Before starting machining, toolpath simulation must be performed. Simulation helps detect potential collisions, unwanted cuts, or missing details in advance, thereby preventing material and time waste.
- Adjusting Cutting Parameters (RPM, Feed Rate, Stepdown): Cutting parameters such as spindle speed (RPM), feed rate, and stepdown must be carefully adjusted according to the diameter and angle of the V-bit tool, the type of wood being machined (hardwood, softwood, MDF, etc.), and the desired surface quality. Generally, lower feed rates and RPM values can be preferred for hardwoods, while higher values can be used for softwoods. Excessively high feed rates can cause tool breakage or tear-out, while very low feed rates can lead to burn marks or shortened tool life. Performing test cuts to find optimum parameters is a critical step in industrial automation processes.
- Dust and Chip Management: Dust and chips generated during woodworking not only reduce visibility in the machining area but also shorten tool life and negatively affect surface quality. The pointed geometry of V-bit tools, in particular, can be more prone to chip packing. Using an effective dust collection system keeps the work environment clean and allows the tool to cut efficiently. Removing chips from the cutting area prevents the tool from overheating, extending its life and ensuring a smoother surface finish.
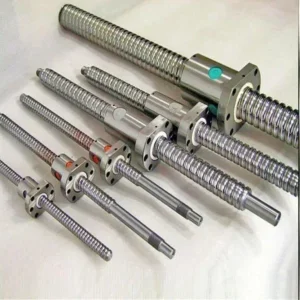
- Machine Maintenance and Control: Regular maintenance of the CNC router machine is vital for the precision of V-Carving operations. The condition of the spindle bearings, the accuracy of axis movements, and the cleanliness and lubrication of ball screws and linear guide rails directly affect the machine’s overall performance. Any backlash or runout can lead to inconsistencies in carving depth and width. Periodic calibrations and checks ensure the machine remains in optimal operating conditions.
Common Problems and Solutions in 3D Woodworking Techniques with V-Bit Carving Tools
While V-Bit Carving techniques yield excellent results when applied correctly, some common problems can be encountered in the field. Recognizing these issues and implementing the right solutions is critical for production efficiency and product quality.
- Problem: Fuzzy Edges or Tear-out
Description: The edges of carved lines appear fibrous, torn, or fuzzy instead of sharp and smooth. This is frequently observed in cuts perpendicular to the wood grain or in softwoods.
Solution:
- Tool Condition: The tool might be dull. Using a sharp tool is the most important step. Dull tools tear the wood instead of cutting it cleanly.
- Cutting Parameters: The feed rate might be too high, or the spindle speed (RPM) might be too low. A cleaner cut can be achieved by reducing the feed rate and increasing the RPM.
- Material Support: Using a sacrificial board underneath the material can reduce tear-out on the exit side.
- Material Quality: Tear-out risk is higher in low-density or very fibrous woods. More dense or homogeneous wood types can be preferred.
- Problem: Inconsistent Carving Depth
Description: Depth differences are observed in different areas of the carved pattern; some areas appear deeper, while others are shallower.
Solution:
- Material Flatness: The surface of the material to be machined might not be flat. Ensure the material is flat or use “surface probing” in CAM software to compensate for material curvature.
- Z-Axis Calibration: The machine’s Z-axis calibration might be incorrect, or there might be backlash in the axis. Check the Z-axis calibration and adjust if necessary.
- Tool Zeroing: The tool zeroing process (Z-zeroing) might not have been done correctly. Set the tool’s starting Z-point with absolute precision.
- Machine Rigidity: The machine frame or spindle mount might not be rigid enough, causing deflection. Using a more rigid machine or reducing cutting parameters might be necessary.
- Problem: Tool Breakage
Description: The V-bit tool breaks during machining.
Solution:
- Excessive Feed Rate/Depth: Higher feed rates or very deep single passes than the tool can handle can create excessive load on the tool. Reduce the feed rate and/or increase the stepdown.
- Incorrect Tool Selection: An unsuitable (e.g., too thin or weak) tool might have been used for the material. Select a more robust tool appropriate for the material and design.
- Chip Packing: Failure to evacuate chips from the cutting area can cause the tool to jam and break. Use an effective dust collection system.
- Tool Runout: Runout in the spindle or collet puts uneven load on the tool, increasing the risk of breakage. The spindle and collet should be checked and replaced if necessary.
- Problem: Poor Surface Quality (Burn Marks, Rough Surface)
Description: Burn marks, rough texture, or irregularities appear on the carved surface.
Solution:
- Dull Tool: Dull tools heat the wood through friction instead of cutting it, leading to burn marks. Replace the tool.
- Incorrect RPM/Feed Rate: If RPM is too low and/or feed rate is too high, friction increases, causing burn marks. Increase RPM or decrease feed rate. Burn marks can also occur if RPM is too high and feed rate is too low. Optimize the “Chip Load” value.
- Tool Runout: Runout can cause uneven cuts, leaving rough surfaces. Check and eliminate runout.
- Chip Evacuation: Poor chip evacuation causes the same chips to be cut repeatedly, degrading the surface. Use effective dust collection.
- Problem: CAM Software Errors (Incorrect Toolpaths, Missing Details)
Description: The generated G-code does not accurately reflect the details in the design or performs unexpected cuts.
Solution:
- Model Check: Ensure the 3D model is correct and error-free in the CAD software (e.g., open edges, overlapping surfaces).
- Toolpath Parameters: Carefully check the toolpath parameters in the CAM software (tool diameter, angle, depth limits, tolerances). Specifically, ensure that V-Carving-specific settings like “Flat Depth” or “Start Depth” are correct.
- Simulation: Always simulate toolpaths before machining. This is the most effective way to detect errors before physical machining begins.
- Software Updates: Ensure your CAM software is up-to-date and known bugs have been addressed.
Conclusion and Expert Advice on 3D Woodworking Techniques with V-Bit Carving Tools
V-Bit Carving techniques are a powerful tool that combines aesthetics and functionality in 3D woodworking. When integrated with the precision offered by industrial automation, they enable groundbreaking results in production. Our field experience shows that to fully utilize the potential of V-Carving, it’s not enough to merely possess the right machine and tool; expertise in in-depth understanding of CAD/CAM software, material science, and optimization of cutting parameters is also required. A successful V-Carving project is the product of meticulousness at every step, from design to toolpath generation, machine setup to post-machining finishing. Thanks to the standardization and repeatability brought by industrial automation, a process optimized once can produce thousands of products with the same quality. This translates into a significant competitive advantage, especially for mass-producing furniture, decoration, and promotional sectors. In the future, V-Carving techniques are expected to be further optimized with AI-powered CAM software and adaptive machining strategies, minimizing material waste and achieving unprecedented levels of detail. Continuous learning in this field, keeping up with new technologies, and internalizing field experiences are indispensable for sustainable success for industry experts and businesses. It should be remembered that every wood type, every design, and every V-bit tool exhibits unique behavior; therefore, initial small test cuts and parameter adjustments are key to saving time and cost in large projects. With the right knowledge, equipment, and an experienced approach, you can create 3D wooden masterpieces that push the boundaries of your imagination using V-Bit Carving techniques.
FAQ
What is V-Bit Carving in CNC woodworking?
V-Bit Carving is a CNC machining technique that uses conical cutting tools (V-bits) to create intricate 3D designs, letters, and reliefs in materials like wood. The unique geometry of the V-bit allows the carving width to vary with depth, enabling highly detailed and sharp-edged designs with a single tool.
What are the critical technical parameters for effective V-Bit Carving?
Key parameters include V-bit angle (e.g., 30°, 60°, 90°), tool material (carbide or HSS), spindle speed (RPM), feed rate, and stepdown. These must be optimized based on the material's hardness, the tool's diameter, and the desired surface finish to prevent issues like tear-out or tool breakage.
What are the common challenges in V-Bit Carving and how can they be resolved?
Common issues include fuzzy edges/tear-out, inconsistent carving depth, tool breakage, and poor surface quality (burn marks, roughness). Solutions involve using sharp tools, optimizing cutting parameters (RPM, feed rate), ensuring material flatness, calibrating the Z-axis, managing chip evacuation, and performing toolpath simulations in CAM software.
What are the main industrial applications of V-Bit Carving techniques?
V-Bit Carving is widely used in the furniture industry for decorative panels and door embellishments, in interior design for custom architectural elements, in signage for detailed lettering and logos, and for creating artistic reliefs and personalized gift items. Its ability to produce fine details makes it ideal for high-value aesthetic applications.
What are the essential best practices for achieving high-quality V-Bit Carvings?
Proper tool selection, accurate Z-axis calibration, secure material clamping (e.g., using a vacuum table), thorough CAM software optimization with simulation, and effective dust collection are crucial. Regular maintenance of the CNC router machine, including spindle and linear guide rail checks, also ensures consistent precision and extends machine life.