How to Prevent Burrs in CNC Cutting Operations
📑 Table of contents (Click to open)
- How to Prevent Burr Formation in CNC Cutting: Introduction and Technical Analysis
- How to Prevent Burr Formation in CNC Cutting: Working Principle and Technical Data
- How to Prevent Burr Formation in CNC Cutting: Field Considerations
- How to Prevent Burr Formation in CNC Cutting: Common Problems and Solutions
- How to Prevent Burr Formation in CNC Cutting: Conclusion and Expert Advice
- FAQ
How to Prevent Burr Formation in CNC Cutting: Introduction and Technical Analysis
In industrial automation and manufacturing sectors, CNC (Computer Numerical Control) cutting operations are a critical step that directly impacts product quality. However, one of the most common and costly problems encountered in this process is burr formation. Burrs are undesirable, sharp metal protrusions that form on cut edges, negatively affecting a product’s functionality, aesthetics, and assembly. These unwanted residues can lead to additional labor costs (deburring, cleaning), extended production times, reduced tool life, and even occupational safety risks. Since precision and efficiency are keywords in modern manufacturing processes, preventing burr formation at its source is vital for gaining a competitive advantage and improving production quality. This technical article and field guide will delve into the fundamental causes of burr formation in CNC cutting, its working principles, and comprehensive strategies to prevent this issue for industrial automation professionals. Our aim is to help you achieve operational excellence by increasing the efficiency of your cutting operations and the quality of your products.
How to Prevent Burr Formation in CNC Cutting: Working Principle and Technical Data
The root cause of burr formation in CNC cutting operations lies in the plastic deformation that the material exhibits during the cutting process. When the cutting tool enters the material, the material first compresses, then fractures under the influence of cutting forces, forming chips. However, this fracture is not always clean and smooth. Especially in the final moments of cutting, as the tool reaches the outer edge of the material, the material tends to bend and tear rather than being completely cut. This results in thin or thick metal protrusions, or burrs, on the edges. The main factors influencing burr formation can be summarized as: properties of the material to be machined, geometry and condition of the cutting tool, machining parameters, fixture and clamping rigidity, and cooling/lubrication conditions.
Material Science and Burr Relationship: The material’s ductility plays a critical role in burr formation. Ductile materials (e.g., soft steels, aluminum alloys) tend to form larger and more stubborn burrs because they undergo more plastic deformation during cutting. Harder and more brittle materials (e.g., cast iron, some high-carbon steels) generally produce smaller, more fragile burrs or no burrs at all. The material’s thermal conductivity is also important; materials with low thermal conductivity (e.g., stainless steels) cause more heat buildup in the cutting zone, accelerating tool wear and increasing burr formation.
Cutting Tool Geometry and Condition: The sharpness of the tool is the most important factor directly affecting burr formation. A dull tool begins to crush and tear the material instead of cutting it, leading to large burrs. The tool’s rake angle and clearance angle are also critical. A positive rake angle generally provides a cleaner cut and reduces burr formation because it allows chips to flow more easily. The clearance angle prevents the tool from rubbing against the machined surface. The tool’s nose radius affects the distribution of cutting forces and surface quality; proper nose radius selection can minimize burrs. The tool material (HSS, carbide, ceramic) and its coating (TiN, AlTiN) also determine tool life and cutting performance, indirectly affecting burr formation.
Optimization of Machining Parameters: Parameters such as cutting speed (spindle speed), feed rate, and depth of cut play a fundamental role in controlling burr formation.
- Cutting Speed: Generally, high cutting speeds suitable for material properties can provide a cleaner cut and less burr formation. However, very high speeds can increase tool wear and lead to heat buildup.
- Feed Rate: Low feed rates can cause the tool to “rub” the material and create thin burrs. High feed rates allow the tool to cut the material more aggressively, which can reduce burrs in some cases, but also increase tool load and vibration. Finding an optimal balance is essential.
- Depth of Cut: Very shallow depths of cut can cause the tool to struggle to cut the material completely, leading to superficial burrs. Sufficient depth of cut can reduce burr formation by allowing chips to separate more easily.
Fixture and Clamping Elements: Rigid and stable clamping of the workpiece ensures clean cuts by preventing vibration and workpiece movement. Insufficient clamping causes the workpiece to vibrate or move, leading to irregular cuts and thus burrs. Vacuum fixtures or special support plates can be effective in preventing burr formation in thin or flexible materials.
Cooling and Lubrication Conditions: Cutting fluid (coolant) dissipates heat in the cutting zone, extending tool life and reducing material deformation. It also acts as a lubricant, reducing friction between the tool and the workpiece. The correct type and properly applied cutting fluid can significantly reduce burr formation. Advanced techniques such as Minimum Quantity Lubrication (MQL) or cryogenic cooling can yield superior results in burr control in some applications.
| Parameter | Value/Description |
|---|---|
| Cutting Tool Material | Carbide (for hard materials), HSS (for softer and ductile materials), Coated Carbide (for wear resistance and tool life). |
| Rake Angle | Positive rake angle (0° to +15°): Sharper cut, less force, less burr. Must be optimized according to the material. |
| Clearance Angle | 7° to 12°: Prevents the tool from rubbing against the machined surface, reduces heat buildup and burrs. |
| Cutting Speed (Vc) | Optimized according to material and tool type. Generally, high Vc provides a cleaner cut but can affect tool life. |
| Feed Rate (f) | Medium to high feed rates (0.05-0.2 mm/tooth): Ensures easy chip separation, very low speeds can cause rubbing. |
| Depth of Cut (ap) | Sufficient depth of cut: Ensures the tool cuts the material completely, prevents superficial burrs. |
| Coolant Type | Emulsion, synthetic, semi-synthetic oils or MQL. Must be selected according to material and cutting conditions. High-pressure cooling improves chip evacuation. |
| Workpiece Clamping | High rigidity, vibration-minimizing fixtures. Full support or vacuum clamping for thin parts. |
How to Prevent Burr Formation in CNC Cutting: Field Considerations
- Tool Selection and Maintenance:
Correct selection and regular maintenance of the cutting tool is the first and most critical step in preventing burr formation. Tool material (e.g., carbide, HSS) and coating (e.g., TiN, AlTiN) suitable for the hardness, ductility, and abrasive properties of the material to be machined should be selected. The tool’s geometry (rake angle, clearance angle, helix angle, corner radius) directly affects burr formation; positive rake angles generally provide a cleaner cut. Most importantly, the sharpness of the tools should be continuously checked, and dull tools should be immediately replaced or sharpened. Dull tools crush and tear the material instead of cutting it, leading to large burrs. Tool wear marks can be an early indicator of burr formation.
- Optimization of Machining Parameters:
Parameters such as cutting speed (RPM), feed rate, and depth of cut (ap) must be precisely adjusted to control burr formation. A balance must be struck according to the properties of the material and the tool. Generally, an optimum cutting speed range exists for a specific material; burrs may increase below or above this range. The feed rate determines the chip thickness per tooth of the tool; very low feeds increase friction, while very high feeds can increase tool load. Generally, an appropriate chip thickness helps chips separate cleanly. The depth of cut determines how much the tool penetrates the material; very shallow cuts can increase superficial burrs, while very deep cuts can cause vibration. Parameter optimization should be performed for each new material or tool combination.
- Fixture and Clamping Elements:
Rigid, stable, and vibration-free clamping of the workpiece on the machine is vital. Insufficient clamping causes the workpiece to move or vibrate during machining, reducing cutting quality and increasing burr formation. Special fixtures, support plates, or vacuum clamping systems can be used for thin-walled or small parts. Clamping forces should be adjusted to hold the workpiece firmly enough without deforming it. The number and position of clamping points should also be chosen to best distribute cutting forces and minimize vibration.
- Coolant and Application:
The selection of the correct coolant and its effective application keeps heat in the cutting zone under control, extending tool life and reducing material deformation. This directly affects burr formation. Emulsion, synthetic, or semi-synthetic oil-based coolants should be selected according to the material being machined and cutting conditions. The pressure, flow rate, and application direction of the coolant are important. High-pressure cooling improves chip evacuation, especially in deep holes or narrow channels, and reduces friction between the tool and the workpiece. Nozzles should be correctly positioned to ensure continuous and sufficient coolant reaches the cutting edge.
- Material Knowledge and Quality Control:
Having detailed knowledge about the mechanical properties (hardness, tensile strength, ductility) and chemical composition of the material to be machined offers a proactive approach to preventing burr formation. Inconsistencies between material batches can lead to unexpected burr formation. Therefore, incoming materials should be regularly subjected to quality control and their compliance with specifications verified. Close cooperation with material suppliers is important for ensuring consistent material quality. Internal stresses or non-homogeneous structure of the material can also affect burr formation.
- Program Optimization and Tool Path Strategies:
The tool path strategies used in the CNC program can significantly affect burr formation. Especially in the final passes of cutting, the way the tool exits the material is critically important. Climb milling generally produces a cleaner surface and fewer burrs compared to conventional milling. Tool entry and exit movements should be slow and controlled, avoiding sudden load changes. Integrating final processing steps such as chamfering or filleting into the program can mask or completely prevent burr formation by eliminating sharp edges. For very thin-walled parts, a symmetrical tool path and balanced distribution of cutting forces can reduce burrs.
- Machine Maintenance and Calibration:
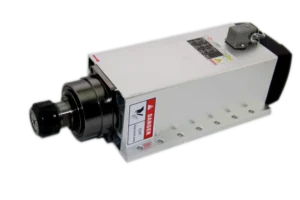
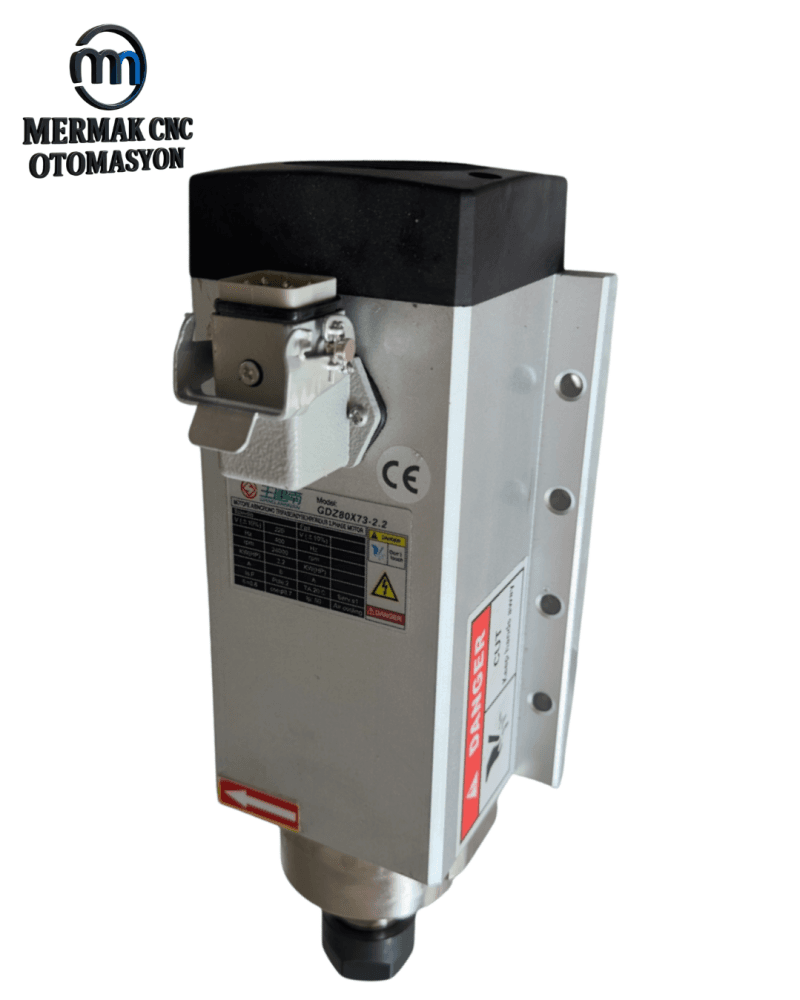
Regular maintenance and calibration of the CNC router machine are fundamental for precise and burr-free cuts. Axial play (backlash) of the machine, wear in the spindle motor bearings, condition of the linear guide rails, and overall rigidity directly affect cutting performance. Machine vibration should be monitored using vibration sensors, and abnormal vibrations should be eliminated. The spindle motor rotating at the correct RPM and precise axial movements ensure the tool cuts the material correctly. Periodic calibrations maintain the geometric accuracy of the machine, preventing deviations that could lead to burr formation.
How to Prevent Burr Formation in CNC Cutting: Common Problems and Solutions
Burr formation in CNC cutting operations can arise from a combination of various factors, and each scenario has its unique causes and solutions. Here are some common problems and practical solutions from an industrial automation perspective:
Problem 1: Thick and Stubborn Burrs on Material Edges at the End of Cutting
Scenario: Formation of visible, palpable thick burrs on cut edges, especially when machining ductile materials (e.g., stainless steel, soft aluminum alloys). These burrs are often difficult to clean and require additional processing.
Causes:
- Dull Cutting Tool: When the tool loses its sharpness, it starts to crush the material instead of cutting it.
- Insufficient Chip Evacuation: Failure to remove chips from the cutting zone can lead to re-cutting or jamming.
- Incorrect Feed/Speed Ratio: Especially very low feed rates or very high RPMs can cause the tool to “rub” the material.
- Incorrect Tool Geometry: Rake angle or clearance angle not suitable for the material.
Solutions:
- Tool Replacement/Sharpening: Regularly check tool sharpness and replace or professionally sharpen when necessary. Coated carbide tools can extend tool life and delay this problem.
- Optimization of Machining Parameters: Increase the feed rate or adjust the cutting speed to ensure the tool cuts the material more aggressively and cleanly. Increasing chip thickness can help chips separate more easily.
- High-Pressure Coolant: Applying cutting fluid with high pressure ensures effective removal of chips from the cutting zone.
- Tool Geometry Adjustment: Use tools with a positive rake angle or increase the helix angle of the tool to achieve cleaner cuts.
Problem 2: Excessive Burrs at Hole Exits or Corners
Scenario: Formation of prominent burrs on the bottom surface or exit corners of the material, especially during drilling operations or when reaching the end of an edge.
Causes:
- Material Deformation at the Last Moment: As the tool approaches the final layers of the material, plastic deformation increases due to reduced supporting material.
- Drill Bit Geometry: Incorrect point angle or insufficient centering of the drill bit.
- Insufficient Clamping: The workpiece is not sufficiently supported in the exit area.
Solutions:
- Reduced Feed Rate: Gradually decrease the feed rate in the last 10-20% of the drilling or edge finishing operation to prevent material tearing.
- Special Drill Bits: Use drill bits with burr-reducing geometries (e.g., drill bits with reverse chamfer edges).
- Support Plates: Place a sacrificial support plate (e.g., wood, plastic) under the workpiece to support the material at the exit point.
- Chamfering Operation: Add a small chamfering operation at the end of the hole or edge to mechanically remove burrs.
Problem 3: Surface Burrs in Thin Materials or Sheet Metal Cutting
Scenario: Formation of thin, capillary burrs along the cut edges when cutting thin sheet metal or plate materials. These burrs are often sharp and cause problems during assembly and handling.
Causes:
- Material Flexibility: Thin materials can easily bend or vibrate under cutting forces.
- Insufficient Vertical Rigidity: The workpiece is not sufficiently supported in the vertical direction.
- Incorrect Tool Selection: Cutting tool geometry not suitable for thin materials (e.g., too large a nose radius).
Solutions:
- Vacuum Fixture or Full Support: Prevent material flexing and vibration by using vacuum fixtures or bottom support plates that fully seat thin sheets on the bed.
- Special Tool Geometries: Use end mills designed for thin materials, with sharp edges and appropriate helix angles. Sharp edge tools can be preferred.
- Adjustment of Cutting Parameters: A combination of low depth of cut and high RPM can reduce material tearing.
- Multiple Pass Strategy: Reduce material deformation by using shallower and more controlled multiple passes instead of a single deep cut.
Problem 4: Vibration-Induced Burrs and Irregular Edges During Machining
Scenario: Observing a wavy structure, micro-burrs, and generally low surface quality on cut edges. This situation can occur especially during high-speed machining (HSM).
Causes:
- Lack of Machine Rigidity: Insufficient rigidity of the machine or spindle motor leads to vibrations.
- Weak Workpiece Clamping: The workpiece is not clamped tightly enough or there are insufficient clamping points.
- Resonance: The cutting frequency coincides with one of the natural frequencies of the machine or workpiece.
- Tool Holder and Tool Extension: Long tools or low-quality tool holders can increase vibration.
Solutions:
- Fixture Reinforcement and Clamping Control: Ensure the workpiece is clamped as rigidly as possible. Use additional clamping points or supports if necessary.
- Shorten Tool Length: Use tools that are as short and rigid as possible. Improve the quality of the tool holder (e.g., hydraulic or shrink-fit holders).
- Adjustment of Machining Parameters: Avoid resonance frequencies by changing the cutting speed or feed rate. Optimize cutting depth or width.
- Dynamic Machine Maintenance: Check and eliminate spindle motor bearing play and axial play. Increase the overall rigidity and vibration damping properties of the machine.
Problem 5: Brittle and Small Burrs in Hard Materials
Scenario: Formation of small, brittle, yet undesirable burrs on cut edges, especially when machining hard steels, titanium, or some ceramic materials.
Causes:
- Material Brittleness: In such materials, localized fractures can occur under cutting forces.
- Tool Wear: Hard materials rapidly dull tools, which can lead to micro-fractures on the cutting edge.
- Incorrect Cooling: Insufficient cooling can cause thermal shocks or micro-cracks on the tool edge.
Solutions:
- High-Performance Tools: Use carbide or ceramic tools specifically designed for hard materials, with high toughness and wear resistance. Prefer advanced PVD/CVD coated tools.
- Optimized Cutting Parameters: Low feed rates and moderate cutting speeds can provide a more controlled cutting process in brittle materials.
- Effective Cooling Strategies: Reduce thermal stresses by ensuring continuous and sufficient coolant flow to the cutting zone. Advanced techniques such as MQL or cryogenic cooling can be considered.
- Tool Path Strategies: Reduce impact loads by ensuring the tool enters and exits the material smoothly.
How to Prevent Burr Formation in CNC Cutting: Conclusion and Expert Advice
Burr formation in CNC cutting is more than just an aesthetic flaw; it is a complex engineering problem that profoundly affects efficiency, costs, and final product quality in industrial automation processes. As detailed in this comprehensive guide, there is no single magic solution to prevent burrs at their source; instead, a holistic approach is required, necessitating the integrated optimization of many factors such as material science, tool technology, machining parameters, fixture design, machine maintenance, and programming strategies. My field experience as an expert indicates that burr formation often arises from the combination of multiple factors. Therefore, when a problem is encountered, it is vital to systematically evaluate all possible factors and produce solutions based on scientific data rather than trial and error.
For companies aiming to gain a competitive advantage in the industry, a culture of continuous improvement and increasing the technical knowledge level of operators are indispensable. Industrial automation solutions such as tool life monitoring systems, vibration analysis devices, and advanced cooling systems offer powerful tools for proactively managing burr formation. Furthermore, closely following new material and tool technologies, evaluating coolant innovations, and even leveraging artificial intelligence
FAQ
What are burrs in CNC cutting and why do they form?
Burrs are sharp, undesirable metal protrusions that form on the edges of materials after CNC cutting. They result from the plastic deformation of the material during the cutting process, especially when the tool exits the workpiece or when tool sharpness is compromised.
What are the main factors influencing burr formation in CNC operations?
Key factors include the material's ductility, the sharpness and geometry of the cutting tool, machining parameters (cutting speed, feed rate, depth of cut), the rigidity of the workpiece clamping, and the effectiveness of the cooling and lubrication system.
What are the most effective strategies to prevent burrs during CNC cutting?
To prevent burrs, ensure cutting tools are sharp and have optimal geometry (positive rake angle). Optimize machining parameters like feed rate and cutting speed for the specific material. Use rigid clamping fixtures, apply appropriate coolants effectively, and consider tool path strategies like climb milling or adding chamfering operations.
How does tool sharpness affect burr formation?
Dull tools cause the material to be torn rather than cut, leading to larger burrs. Regularly inspecting and replacing or sharpening tools is crucial for maintaining cutting quality and preventing burr formation.
Is workpiece clamping important for preventing burrs?
Yes, proper clamping is essential. If the workpiece is not rigidly held, it can vibrate or move during cutting, leading to irregular cuts and increased burr formation. Vacuum tables or specialized fixtures can significantly improve stability.